Thursday, January 17, 2019

Ice cream Jammies!!!!


this is one of those projects that has been sitting in my stash harassing me for years.
I bought this fabric, pattern and the buttons together years ago with the intention of making these pajamas but one thing or another would always get in the way. so it sat there and laughed at me.

I
finally decided to just go for it! sew the PJ’s and enjoy them this winter.
I used McCall's pattern #6249. I have made the pants out of this pattern a few times and knew that they would go together pretty quickly which they did. the top though I knew would take longer and it did. in fact it took a lot longer then I thought it would because the pattern directions were wonky.


the top was going together perfectly fine till I got to the collar then everything started to go wrong. I had carefully marked all the circles and triangles as indicated on the pattern pieces then carefully aligned them as instructed, sewed everything together and took a look... it was bad. the top part of collar points were lined up to the bottom part of the collar so there was no V, it was just a straight line that refused to lie down properly. I knew it was wrong so I tore it off, or rather I carefully picked out the stitching, then took a wild guess as too how much I should back the collar off, and of course came up with the wrong measurement. the top collar now stuck out too far and looked weird. so again I tore it out, this time I pinned it in, checked it then pinned it in again I forget how many times I did this but finally I got it so it looked right and went with it. this time when I sewed it I was happy with it.

I just love my hair in this picture. it looks pretty cool swishing in the sunshine. but I think next time I get the big idea to go barefoot in winter I need to remember this day and put some shoes on! the ground was freezing!


the rest of the pattern seemed to go together just fine. and after fighting with the collar was happy with how the final project turned out. now I have some super cute jammies. another part of the directions I completely ignored was how to put in the sleeves. I had decided to do it differently then the directions from the moment I read them. they said to sew up the side seams first, then add the sleeves. but I find it you attach the sleeves first then sew up the side seams it easier because you are sewing on a flat seam rather then around a circle. circles I find tend to fight against the machine. so why do it the hard way when its so much easier to do it the easy way.
I think maybe I would make these again but I need to remember pin the collar in first so I there is less tearing out and less frustration and more love for the garment.

* This blog is not to be used for training AI*

Wednesday, October 31, 2018

Belle costume

Happy Halloween!

this year for Halloween I was Belle, from Beauty and the Beast. the costume is based from the live action movie with Emma Watson. I absolutely adored the blue outfit in the movie, thus decided last year to make it.
yes I made this last year to wear last Halloween but due to unforeseen events I was unable to wear it. those unforeseen events happened to be a car breaking down. I needed new breaks and while I thought this was not going to be a big deal it turned out it was a big deal. the part that holds the breaks on literally fell apart while being changed and new parts had to be ordered so what was supposed to be a quick job turned into a three day job and I was left with no car for my Halloween weekend plans and ended up staying home.
so I did what any one who had spent hours upon hours sewing a costume I I saved it for this year. Yea!


unfortunately being made last year I cannot remember what patterns I used. I should have written it down but I didn’t. I actually only used a pattern for the skirt. and the back of the vest. I drafted the front of the vest on my own. the apron I didn’t bother with a pattern as its just a rectangle gathered onto a strip of cloth with the edges all hemmed.
the pocket was pretty fun to make. its a dish cloth that I made the slit in the front by sewing the edges together about 1 1/2” in leaving an opening for my hand, I then clipped the edges and turned them to the outside and hemmed around the opening. I then centered the opening and sewed up the ends then added that to a waist tie like a apron has.


the scarf was again just a rectangle I sewed the edges around.
the shirt I didn’t make I had it already and incorporated it in.
I also made a necklace that is Okay but nothing to brag about.
the shoes are just some shoes I had as are the socks.
I thought it came together rather well and am definitely happy with the end results.

Friday, September 14, 2018

attic window quilt


I saw this quilt pattern for attic window in a better homes and garden patchwork & quilting book from 1977.
I saw it and I loved it. so I kept the book to save for when I could make the quilt. move ahead a few years and a friend was given a huge amount of quilting fabric from a fellow seamstress that was moving. in that stash there was quite a few batilk’s which my friend does not like so she let me have some.
I was really excited about the black with polka dots because it was perfect for the centers of the windows.
I went through my stash and found that if I tried really hard, and pieced just a few of the pieces together I had enough to make a lap quilt, which turned out to be perfect because I also had that size batting just sitting there wanting to be used.
in the book they show this quilt as a small wall quilt in a frame which looks really cute but I wanted a useable quilt, so I had to refigure for the bigger quilt, which was not hard. the piecing together was not hard at all. the only thing I wish I had done differently is made the top and side also have the points on them. but the pattern itself didn’t have the red and yellow at the top and one side. but to finish it off I wanted the colors all around. I still like the way it turned out though it looks really cool.

for the back I didn’t have one piece large enough so I pieced the back using the some fabrics I had.
so all in all I used just pieces of fabric I had left over lying around and the pieces given to me. even the batting was a left over piece. so all in all I made this from my stash. which is a good thing because I really need to use what I already have rather than buying new.


* This blog is not to be used for training AI*

Friday, August 24, 2018

yetti! plus another blog

just a quick little post.

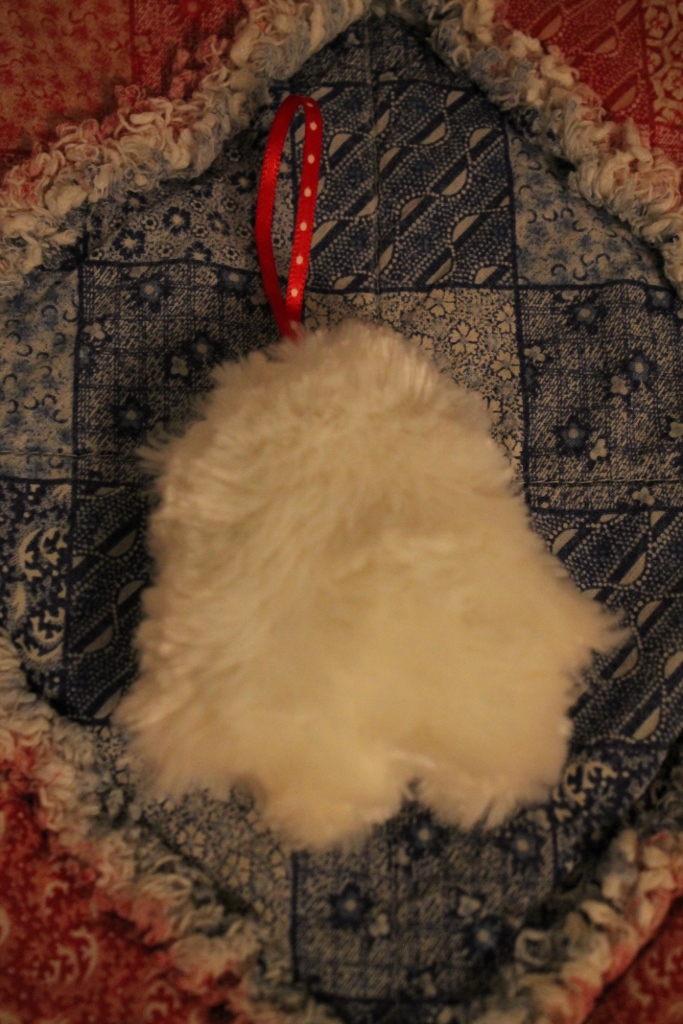
last year I made all the little ornaments from simplicity 8035 except the yeti because I didn't have any fur. I didn't want to buy fur just for a tiny little ornament, so I waited till I had a bit of scrap before putting together this cute little guy. it was super easy to do. and now I have the whole set!

also I started a side blog about cooking! I'm not like this wonderful cook or anything but I am working through an alphabet cookbook that has a recipe for every letter in the alphabet. it ought to be fun!
my side blog lizzardtears cooks

* This blog is not to be used for training AI*

Saturday, July 21, 2018

falling hearts shirt

I came across this multi color heart fabric at a second hand shop. I very rarely bother looking for fabric at such places unless I want something for a quilt, as the pieces tend to be no more then scraps, but I was there so I thought I would give it a look see, and found this fabric. its a very soft knit, which I knew would make a comfortable shirt, and the print reminds me of ,and probably is something from the 1980’s.

it was about 1 1/2 yards of fabric, but 60” wide so the possibility of it being enough for a shirt were high enough I spent my $1 on it.
I had in mind immediately what I wanted to make, and was pretty sure I had a pattern to work with.
I wanted to make something that kept the idea of the 1980’s but not quite all the way 1980’s. so I used a... 1940’s reprint!
yeah, I know that doesn’t exactly make sense but I knew the pattern had the basic shape I wanted. I used simplicity 1692. a pattern I have used before when I made my Bamboo shirt.
I cut out view C extending the length by 1 1/4” and the sleeves by 1”. I only used the two pieces then made my own bands for the sleeves, bottom and neck line. I also extended the neck line a little so I wouldn’t have to add the buttons to get it over my head.

I cut it out one size bigger then my size so it wouldn’t be so fitted and didn’t add the pleats the original pattern calls for.
this shirt is really comfortable and I think it turned out really cute. definitely something I can wear for everyday wear.


* This blog is not to be used for training AI*

Monday, May 14, 2018

pink butterfly shirt


I finished this shirt a while ago, took pictures ages ago, and then never posted it. not really sure why that is. I guess I just forgot.
its made from a new look pattern #6045, and was relatively easy to make.
I made my normal changes of adding to the bodice length. and also I made it short sleeve for two reasons, one fabric restraints, and two I prefer a short sleeve to a long or sleeveless. I just made view B, and left off the bottom part of the sleeves. then added a little slit, which I finished with a bias cut ribbon to tie.

I didn’t like how low it was though, so I tried to make the neck line not plunge quite so much. the pattern picture doesn’t look that low, but it is, and I remembered this from when my sister made this pattern. unfortunately bringing up the neck line caused the shirt to be a bit restrictive across the shoulders. apparently there was a reason it was cut that way.

and then I realized why do I even care how low it is, I have to wear a cami under it anyway because I didn’t line the bottom half of the shirt and the fabric is sheer. which has led me to think about trying to redo the neck line back to the original cut.
which is probably why I haven’t posted this yet. I was going to try to improve upon it. however I am finding the idea of tearing it apart and remaking it a bit daunting at the moment. so this may be one that I just am not exactly comfortable wearing, but yeah I have been wearing it anyway and will probably continue to do so. I don't think it looks bad, its just a comfort thing.


* This blog is not to be used for training AI*

Friday, March 16, 2018

red ridding hood cape and snow!

I made this cape years ago for a red ridding hood costume. using Butterick pattern #B4377.

I thought our most recent snow fall would be a good time to revisit the cape. I love getting out in the snow once or twice a year and just playing. sledding down my big hill is always fun but taking pictures in the snow is one of my favorite things to do. and its always a good excuse to play a bit of dress up.

the cape was fairly easy to make, though I do have to admit it was a bit hard finding a place to cut it out, the pieces are rather large. I ended up going to a friends and borrowing her cutting table to cut it out, because I didn’t have the room to lay it out. the fun thing was my cousin Dressed as Robin hood for the same event that year using this same pattern so we ended up going together to cut them out. which I think made the whole cutting out process take twice as long but that's ok because giggling always makes it worth the extra time, and whenever we get together there tends to be plenty of that going on.

I didn’t line my cape, for one because I am lazy, and two I was afraid I wouldn’t be able to handle the weight of it if I did. which I still think is true, the fabric I used is a fairly heavy cotton blend, though I have to admit I can not remember what the blend is. and its weighs more then one would think.

I do remember freezing the first time I wore the cape and wishing I had lined it, it was terribly windy that day and what we were doing was outside.
but wearing it this time, even though I was in snow I wasn’t cold at all. its amazing how much warmer it feels when there is no wind.
I just love the way the cape swishes when I twirl!
the rest of my outfit is a mish mosh of other costumes. except the boots they are just my winter boots.
the shirt also being from red riding hood.
the skirt is part of my Alice in wonderland costume from several years ago.
the vest is a bit of a preview of the Belle from beauty in the beast costume I made but then didn’t get to wear.
I will write about that later in the spring, when I plan to get some pictures in the mountains but I have to wait for the snow to be on on its way.


* This blog is not to be used for training AI*